This Weeks Activities:
Instructions are in RED
Activities for Week Beginning 15th June
Click here to go straight to the relevant day's activities:
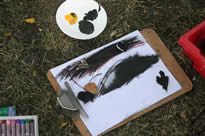
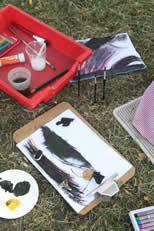
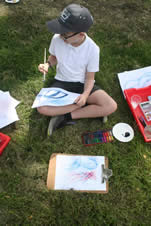
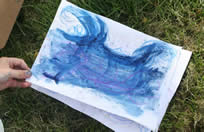
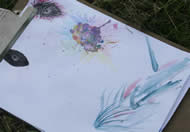
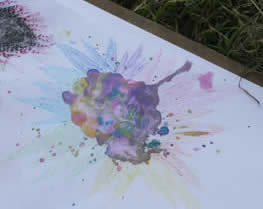
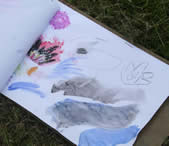
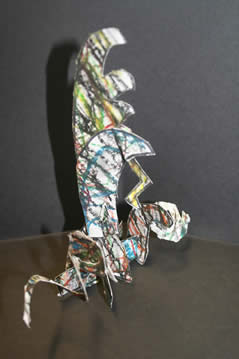
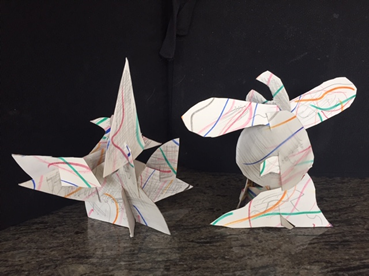
Have a look at our Night Ferry sculpture work from class - we really enjoyed some focused, calm creative time doing this, and the results were fantastic:
Here's EP's scupture.
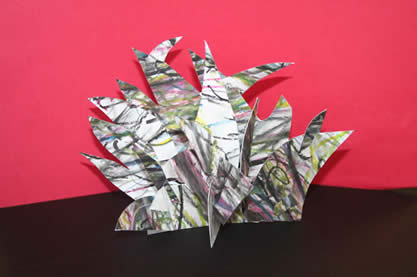
Here's WO's sculpture
Here's OR's from home...
Monday 15th June:
Task 1: A Kahoot Quiz about MARS

We will be having a weekly Kahoot quiz posted on Monday from this week, and I'll create or find one based around something we've been looking at (or I may throw in a really random one)
This week - its based on the Mars comprehension we read last week.
Follow the simple instruction below to take part - have a go, have a guess, see if you can finish in the top 5 !
1. All you need to do is go to 'kahoot.it', or click on the
banner below..
2. Type in the code of the quiz I have provided below.
3. Type in your initials so I will know its you.
3. Choose A, B, C or D in the time allowed.
4. The Quiz quizes finishes at 3:00pm on Friday - I'll post the results
up next week.
Challenge PIN : 02532872
Task 2: Physical Education: Hand-eye Co-ordination
This week, we have got two hand-eye co-ordination activities to practise and get really good at. The first is a fun challenge(the elbow coin catch), and the second is a skill everyone would love to be able to do (juggling).
Just click on the P.E. Wall below and find out what to do:
Tuesday 16th June:
Art and Design :
This week, we are going to explore the world of 'Graffiti', and looking at the techniques needed to produce some colourful, vivid and striking work.
You'll need to come up with a great nickname, or 'tag' for yourself, from which you are going to create your own unique design. I've had a look in the archive, from when we created some graffiti in an art project several years ago, so click on the link to see what can be achieved with some practise.
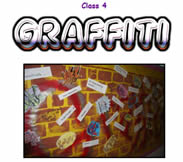
Click here for the class 4 graffiti page.
Our Class 4 Introduction
to Graffiti Lettering:
If you want to find out a little about the histiry of graffiti, here is a powerpoint to explain:
Click here for history of graffiti Powerpoint Vrs
Click here for history of graffiti PDF Vrs
Graffiti Task:
First of all, you need to choose a great nickname which you will turn into a great graffiti tag: make it something funny or clever, but try not to make it too long.
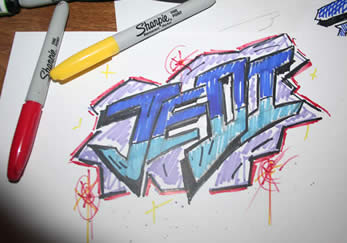
Here's my quick effort from tonight - I followed video 1 to start with.
We are going to sketch it out and create your own style 'tag' with pencil. Then we'll add lots of features to it to create that striking 'jump out of the page' effect we want.
I've looked through lots and lots of instruction Youtube videos for you and have found some useful ones to teach you the basics.

Video 1. Box Letter Style: (This is a YOutube link)
Start with this one - it shoes you how to create that graffiti letter effect by just starting with the lines from your letters, then using simple rectangles - you can stretch them however you want to create crazy lettering.
Video 2: Full Introduction Tthis is an MP4 download file)
This next video uses the word 'MOM' to show you lots of the techniques. This focuses on bubble writing - you could add a sharper 'wild-style' using the box method above.
1. Bubble Writing
2. Drop shadows
3. A Background
Try to think about your colour scheme - and a two tone (top one shade, bottom another) often looks effective.
Video 3: Bonus (This is an MP4 download)
I have found a great extra help video to show you how to simply draw every letter in graffiti style bubble writing if you need help for a particular letter.
Video 4: Super Advanced Shadow Skills (Youtube link)
If you want some more advanced lessons about how to create the shadows beneath the letters, this video is quite detailed but is a very good explanation of how to get it right.
Here's a great extra set of simple instructions for different letter effects - I have scanned them from one of my graffiti books:
Click here for some step by step word effects
Remember we need to do it in pencil first, then you can use felt tip, or pencil (like the examples on the previous class 4 graffiti page link above).

Send me your graffiti 'piece and we'll share it with everyone - take your time with it this week and produce something striking
Wednesday 17th June:
Geography:
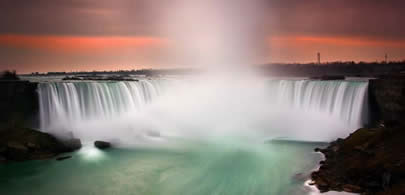
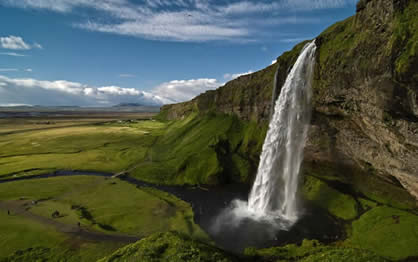
After looking at some river floodplain features last week, this week we are going to explore waterfalls, how and why they form and impact do they have on the landscape. We'll also be finding out about some of the world's most famous waterfalls.
Here's some synomyms(words which mean the same)
for waterfalls:
cascade, chute, white-water, rapids, falls, torrents
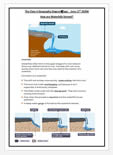
I've looked around for a really good explanation of why waterfalls form and like this page on Bitesize the best. It has a fantastic animated section which explains how the waterfall forms, and how it's plunge pool is created in the bottom.
Task 1:
Read the page and watch the film first.
Click here to visit the Bitesize Waterfall page with film.
I've also found another short film which I've edited to focus on the waterfall ideas we are learning today.
Click here for another nice, clear explanation
The animation below will show you how a waterfall can push back through the land to create a 'gorge' - you can play the animation and click the fullscreen option to see it clearly.
Task 2:
We have found how useful a clear, beautiful, and labelled diagram can be in explaining geographical features (look at RDs from last week below). I have created this pdf with some clear some diagrams and explantions for you to copy into your book.
Task 3: Famous Waterfalls Research
(There is lots to do today but don't rush - you can complete things on Friday afternoon when we will have a finish off session for everything this week)
It would be good for us to know something about famous waterfalls in the world - so time for you to do some good old fashioned research:
Find out:
1. where in the world these waterfalls are
2. how high they are
3. then put them in height order.
The highest one is actually the highest waterfall in the world!
a. Tugela Falls
b. Angel Falls
c. Niagra Falls
d. The James Bruce Falls
e. Victoria Falls
f. Yosemite Falls
g. Iguazu Falls
f. Olo'upena Falls
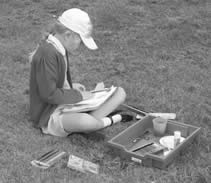
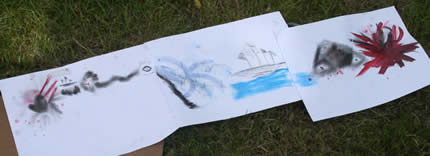
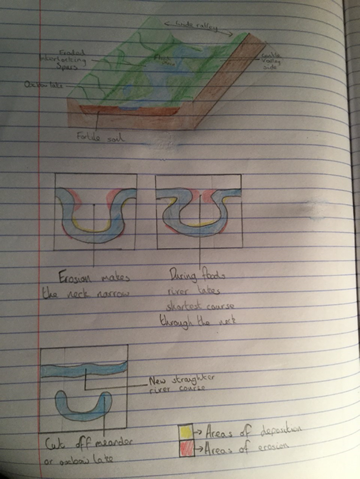
In case you're wondering the level of work you can produce with some care and attention at home, have a look at RD's fantasic , beautiful geography diagrams below from last week.
Thursday 18th June:
Science:
Task 1: Observing and Recording Our Plants
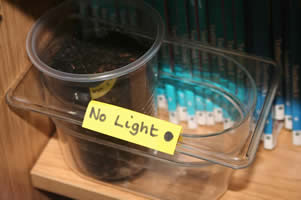
Time to see how our seeds have done in the week since we planted them. Use your recording sheet, or table you have drawn in your book from last week, to record your observations.
1. Measure any root or stem growth.
2. Make a careful, 'coloured-in' drawing of how the seed looks now (choose the seed which seems to have grown most, and stick with this one each week until the end of term).
Click here to view the recording sheet from last week
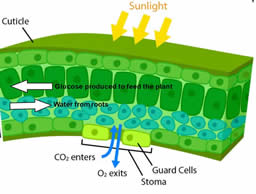
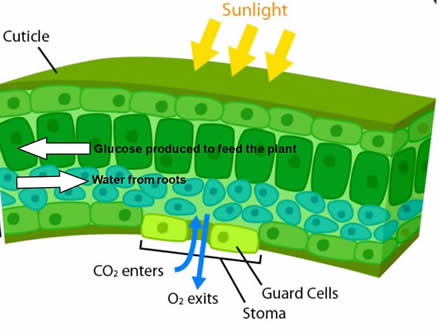
Task 2: Understanding Photosynthesis
I have looked for a teaching video which explains what photosynthesis does actually inside the plant, rather than give you a basic cartoony video (of which I have watched lots and lots and they don't really explain the process well)
I thought this computer graphic animation one was far more interesting and not too tricky to understand.
It really shows you what the molecules are doing inside the leaves and how sunlight creates glucose (sugar) to feed the plant, and oxygen.
Have a look (it's a Youtube link) and see if it gives you a clearer understanding of how the plant uses water, carbon dioxide (CO2) and sunlight.
Click here for the photosynthesis Youtube link
Task 3: Proving that Plant Leaves store air(gases)
From watching the film above , you'll have seen how the stomata control the taking in and release of air in and out of the leaves. You can do this experiment to prove they do this. Make sure you put the leaf in the water, bottom side up (the side with the veins on).
Don't Forget : Take a picture of your results and stick in your book, not forgetting to label it and explain what you did.
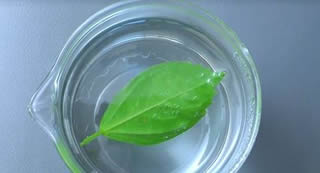
VERY IMPORTANT - THIS EXPERIMENT NEEDS HOT WATER, SO ASK AN ADULT TO DO THIS WITH YOU
Click here for the stomata oxygen experiment.
Extra task: Try this with a variety of leaves and see if the size, thickness or colour of the leaf makes a difference to how many bubbles ae produced , and how large they are.
Answer these questions from your investigation.
1. Do thicker leaves stores more oxygen?
2. Do leaves with larger surface area produce significantly more oxygen bubbles?
3. Does the shade of green affect how much oxygen is in the leaf?
Task 4: Draw your Leaf / Photosynthesis diagram
Copy this diagram into your book to explain how water, sunlight, oxygen, carbon dioxide and glucose are all related in the process of photosynthesis. Click on the diagram if you want it as a pdf document for more detail..
Friday 19th June:
Today is the Norfolk School Games
R a i n b o w Ru n
Click on the link to see what to do to get involved - we will be doing this in class today on the new running track.
I'll post up some colourful pictures this weekend so you can see how we got on. Click below to see more..

Make sure you let the School Games know on their social media and send them a photo as well for their celebration video which they'll be creating in the next week to celebrate all our School Games efforts over these last 10 weeks... and don't forget to send one to me so we can put it up on here..
Click here for more information
from the Norfolk School Games Site
What have year 6 been doing in school ?
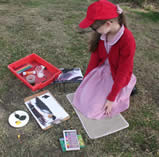
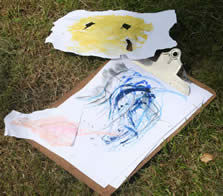
Have a look at the practise Night Ferry artwork we did in school last week.