This will be our daily curriculum page, where you can find any additional resources I may need to give you.
Remember, you can contact me on Teams Chat at anytime during the school day.
This Term's Theme:
Take One Picture
Extra Resources and Children's Work:
Click below to jump to your required section:
1. Art & Design - Design Your Bsnd Brand
Part 1 of our 'Express Yourself' mental health week project.
2. Science - Measuring With Marshmallows
Measure the speed of light using your microwave
(Make sure an adults helps)
3. Geography - Volcanoes: 3-week task
Bonus tasks and learning added for Wednesday 20th January
4. See our Escher 3D work from class and at home
5. See our figure sketching from class and at home
Week Beginning 1st February
Tuesday 2nd February:
Express Yourself Project: Brand Your Band

Today we’ll begin a design task which will need all your creativity.
One of the ways in which we can express ourselves is through music, so imagine you have the chance to be a world wide music superstar : the lead singer in your own band.
Task 1: First you’ll need a name for your band. We need to be creative - and at the same time reflect something of ourselves , what we believe, are passionate about or want to say as a message.


Here’s some examples of famous band names. Some of them are strong names, some are a little more ‘quirky’ and some are quite mysterious, and even humorous – it all depends on how you want to express yourself:
Blossoms Red Hot Chilli Peppers The Stone Roses
Coldplay Imagine Dragons Maroon 5
Little Mix The Wanted Daft Punk The Vines
The Beatles The 1975 Take That Foo Fighters
The Rolling Stones Arctic Monkeys Arcade Fire
Green Day A Simple Plan No Doubt Metallica
Snow Patrol Alien Ant Farm The Smashing Pumpkins
The White Stripes Garbage The Pixies
Task 2.
Next, you’ll need to create a recognisable design to write your name. This could be using a particular font, or use your creative skills to design a more artistic creation.
Have a look at how some of the band names have a specially designed logos to use on their music products:

Week Beginning 18th January
Thursday 21st January: Science - Light Speed
This week , we've taken a break from our forces work to do some serious science - physics to be precise.
We are going to learn a little about electromagnetic waves, and more particulalry light waves.
Task 1:
Copy the diagram in the link , in your books, which shows you all the waves of energy which are vibrating around us.. They all travel at the speed of light (which is very, very, very fast).
CLICK HERE for the diagram pdf.
Task 2:
We are going to .measure the speed of light using a plate of marshmallows (large or mini - or you can even use a larger bar of chocolate).
Before you start - YOU MUST ASK AN ADULT AND ASK THEM TO SUPERVISE YOU DO THIS.
Here are the instructions BUT watch the videoslinks below first:
1, Spread your marshmallow out on a dish, but not too far apart.
2. Take out the rotating plate from your microwave.
3. Set your microwaveon a low setting (I set it to 50%)
4. Try heating your marshmallows for a short time - I only needed 20 seconds.
5. Be careful taking out the plate - it may be hot.
6. Measure the distance between two areas which have melted - there should be areas inbetween which haven't.
7. Stop the videos below at the end and follow the calculation to work out the speed of light.
Speed = Frequency x Wavelength
that means
Speed of light = Your microwave Mhz number x double the
distance you
measured
I have found two great videos to teach you what to do. The first one uses chocolate (but marshmallows work just the same), and measures the speed of light in metres per second. That means you'll need to do your measuring in cm).
Click here for link to video 1
The second one is from the USA and meaures light in miles per hour). You will have to measure in inches, then multiply your inches by 63360 with a calculator to convert it to miles.
Click here for link to video 2
Tuesday 19th/26th January: Art - Figure Sketching
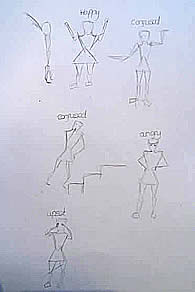
Here's some of figure sketching skills put into practise:
 ]
] 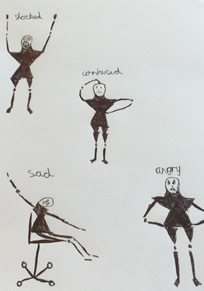
Some great figures from SH A nice effect in black ink from J
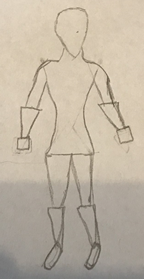
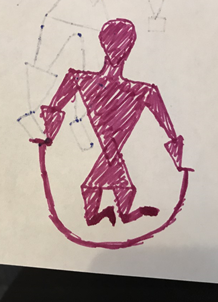
Some great work from TS at home after our Team online lesson
Week Beginning 11th January
Wednesday 13th January: Geography
Volcanoes and Earthquakes
This term , we are looking at earthquakes and volcanoes. Year 6 may recognise some of these resources, as we started to looked at the volcano element last summer during lockdown as it is such interesting topic to investigate.
However, I will be adding new resources and learning here, and there are new tasks to choose from for your 3 week tasks. Choose new tasks which you didn't look at last time. I will be adding new learning about about volcanoes and volcanic processes happening actually under the ocean to further expand your knowledge.
Your Tasks:
Your Geography task will cover this Wednesday task and the next two Wednesday Geography sessions. You wil need to choose 3 tasks to do from the list further down the page, (or more if you wish) to create your mini project, I will add new resources each week.
Bonus Tasks and Learning Added:
Wednesday 20th January:
This week , I have added some additional learning about volcanic activity under the sea, so please watch the videos and learn about 'sea-floor-spreading' - this will give you some additional tasks to choose from when completing your -task assignement for next week.
The Mid-Atlantic Rift and Sea Floor Spreading:
Watch these two excellent videos:
The first one starts by looking at some incredible creatures who live near to volcanic actvitiy under the ocean - but then shows you how strange lava and molten rock behaves if it erupts under the sea.
Video 1: Click Here -Underwater Volcanoes
The second video is a 6 minute lesson, explaining how the molten rock under the sea, pushes up along the ridge in the Atlantic sea-bed , pushing out left and right and creating a new sea floor.
Video 2: Click Here - Seafloor Spreading
Bonus Tasks to Pick from:
(as well as the list further below)
Bonus Task 1. Draw a diagram of the sea-floor spreading process in the North Atlantic Ocean, and add an explanation of what is actually happening.
Bonus Task 2. Write a piece of poetry, describing how the volcanic rock behaves and moves and grows beneath the ocean - include elements of how it is creating new sections of the earth's crust.
Bonus Task 3. Download the lists of volcano vocabulary and write them out in your book, alongside the correct defintion. Make sure you choose the correct defintion to go with its word.
Click here for your volcano vocabulary task
Our Core Volcano Learning
Volcanoes like Mount St. Helens, which erupted in 1980, get their source of molten rock through faults in the rocks beneath the earth (called magma), and when it reaches the surface, it’s name changes to lava(above ground). This rock is so hot, it can actually flow like a rive.
To begin with about volcanoes, using Mount St. Helen's as an example. For Year 6, I have also added some new learning about what is happening under the ocean, but remoind yourselves of our previous learning as well.
To help you, I have found three great videos explaining the eruption of Mount St. Helens below:
Video 1: Click to Visit the Smithsonian St. Helens Video
Video 2: Click here to visit a fantastic short film showing the ONLY images that exist showing the actual explosion fully.
Video 3: Click here to visit a fantastic short film showing the actual eruption from National Geographic
Your Task List:
Choose 3 or More Tasks
Over the next 3 Weeks:
I have provided you with a list of tasks to choosde from. You may need to do some extra research to finsd information, but I have added lots of links and resources I have researched to help you.
It May Help to Make Your Own Project Book
You could create a mini-project book to contain your tasks instead of just writing them in your writing book; its up to you, but I will be expecting care and pride in your work and learning here.
Click Below to for book making Instructions
I've attached the Johnson paper booklet making instructions here, so give this a click.
I suggest the 'book with 8 pages' or even better,'the book with detached cover. If you use a different colour piece of paper or card for the cover it will look great.
Note : these A4 books will be quite small so you will need to write small and delicately.
If you use A3 paper , you'll get a much larger booklet.
1. A timeline of events leading to the eruption.
2. A FULLY labelled diagram of the sequence
of the eruption of Mount St. Helens volcano,
showing how the eruption happened.
3. A FULLY labelled diagram of how the inside of a volcano like Mount St. Helens operates. (it is a composite or 'stratovolcano' which produces dactite lava)
4. A newspaper report of the event.
5. Make a geographical teaching model of a volcano, which tells you what's going on inside:
I've found three foldable ones here if you have a printer, but you could make whatever kind of model you like (a labelled lego version would look amazing)
a. The icelandic volcanno, 'Eyjafjallajokull' - yes, that's it's real name.
Click here for the model template.
b. The extinct volcano at Arthur's Seat in Scotland. Click here for the model template.
a. Mount Fuji in Japan.
Click here for the model template.
6. An explanation text of the event.
7. A fact-file of details about Mount St. Helens.
8. A piece of quality poetry, describing the Mount St Helens eruption, watchthe links at the top of this topic to give you lots of inspiration and ideas for this.
- or a clever poem describing how a volcanic erupton develops using some good scientific vocabulary. This will be a mix of a 'teaching' poem and a dramatic piece of exciting poetry.
9. A imaginary diary of someone who experienced the eruption and saw the events unfold. There are lots of eye-witness accounts on the web, but here is a good one (click here)
Click here for this task list on pdf
Here's Some Resources and Help To Get You Started on Your Task Choices:
Here's 30 cool facts about Mount St. Helens
Here's a link to a good site to give you lots of information about Mount St. Helen's, along with a quiz to test yourself on your St. Helens knowledge.
Some Diagrams You May Want to Use:
1. Here's a pdf containing 3 diagrams which may be useful for your project booklet: (click)
2. Here's an additional diagram link of the sequence of how the mountain collapsed
You might find some much better diagrams for your project during your own research about volcanoes and Mount St Helens.
Week Beginning 11th January
Wednesday 13th January: Art - 3d Escher
Have a look at some of our Escher 3D sculptures
from class and at home
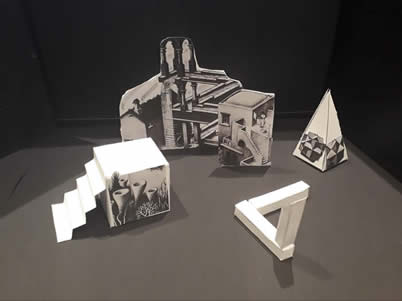
A weird Escher landscape by DW - and how did she make that impossible
Escher triangle?
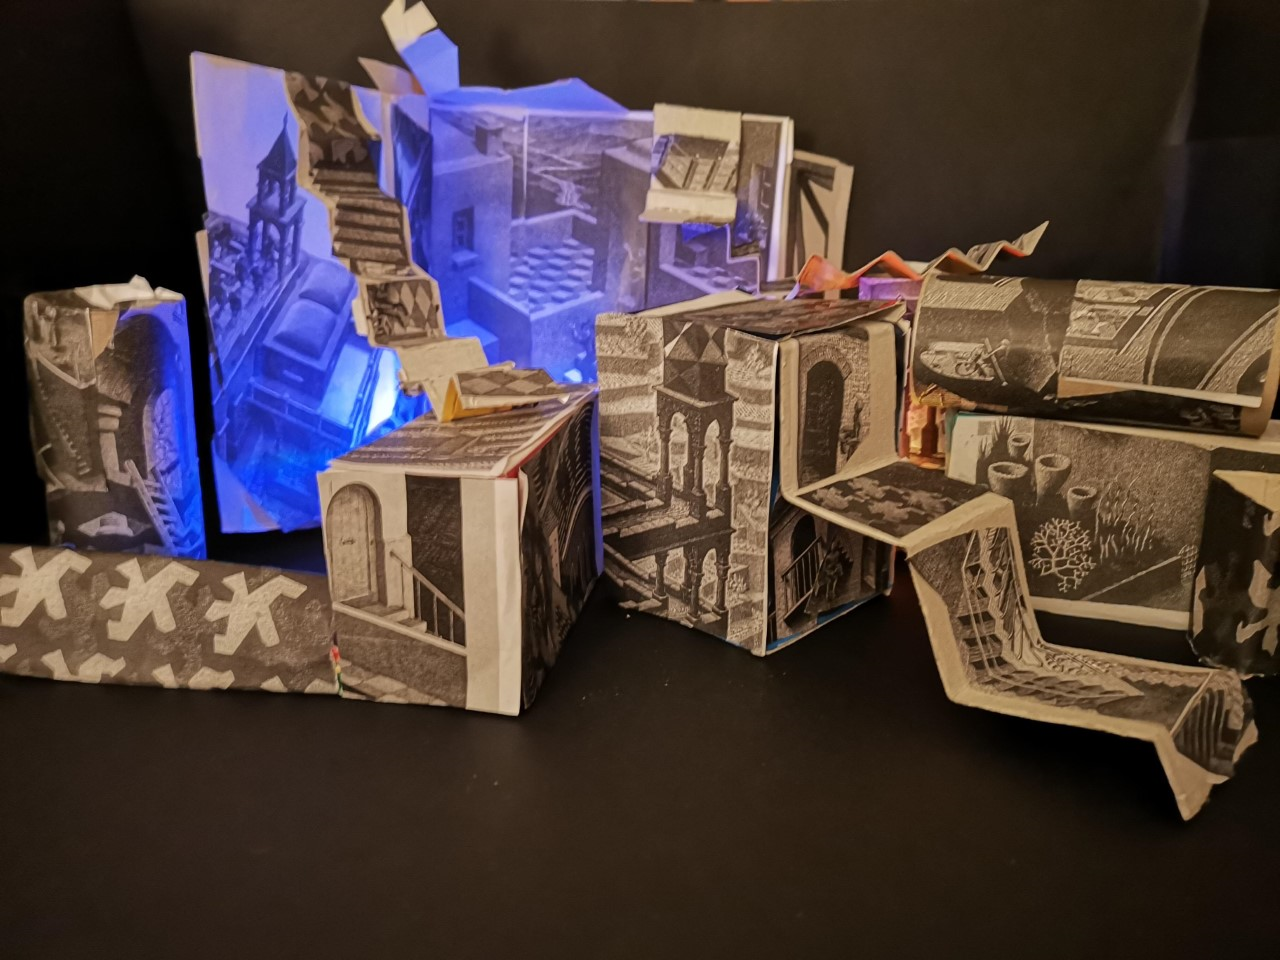
Here's a mysterious, backlit Escher town by MH
Week Beginning 4th January
Thursday 7th January: Art - Cutting up Escher:
Here are some examples of what our cut-up Escher designs are looking like in class.
)
Here's Rs weird structure
J has his house on top of the columns Water works a strange way in B's

