This Term's Theme is;

This Weeks Activities:
Instructions are in RED
Activities for Week Beginning 8th June
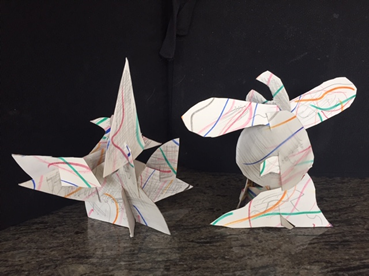
Have a look at our Night Ferry sculpture work from class yesterday - we really enjoyed some focused, calm creative time doing this, and the results were fantastic:
Here's EP's scupture.
Here's WO's sculpture
Here's OR's from home...
Friday 12th June:
Design and Technology:
Book Making and Paper Craft
Instructions on how to make a variety of books with A4 paper will appear here this morning -
Click here for a booklet of fantastic, easy to fold booklets.
These sheets were given to me by Paul Johnson when I attended one of his brilliant workshops: he writes books about how to make your own booklets and pop-up books and how to use them to create beautiful creative writing. Use today and the weekend to have a go at as many as you can: see which one would look best for your travel brochure next week (you might want to use your imagination and skills to change one of the animal ones into a Pandoran animal)
Try out a few of the designs - you will be using them to create your brochure on Monday - adding your logo, copying your persuasive writing and adding pictures of photos to make it look attractive.
Thursday 11th June:
Science:
Today, we are going to continue our study of plant reproduction, by looking at seeds and germination, and how lack of sunlight may affect germination and growth..
To begin with, watch this film which explains how germination works and explains the scientific vocabulary for the parts of a seed.
Click here for the germination film
Task 1: Label a seed.
Wrile the date and LO in your book and draw a neat diagram of a seed below and label it's parts.
Task 2: Add some extra labels
If you've watched the film, you can add the following labels to your diagram (stop the film at the correct points to help):
1. The Radical
2. The Epicotyl
3. The Hypocotyl.
Task 3: Record your Observations:
In your book, on on the sheet (if you can print it off ), fill in week 1 by carefully sketching the seed, colouring it in, and noting down any details you can see; there are boxes on the recording sheet to do this.
If you can't print the sheet out, don't worry, copy it onto a two A4 pages in your book: we will use this table to update how the seeds grows in the next 5 weeks.
Write a predication as to how you think the growth will differ between the seed in the dark and seed in the light over the next week:
I think that the seed in sunlight will _______________
___________________________________________
I think that the seed denied sunlight will ___________
___________________________________________
Click here to view the recording sheet.
Task 4: Plant Your Seeds for our Experiment.
We are going to find out how light affects the germination and growth of our seeds. You will need to have two pots/plastic cups/glasses to carry this out. If you haven't got seeds right now, don't worry, try and obtain some this week - beans are the best..
You have two options in planting your seeds (we are using beans and sunflowers in class): you could grow them in soil, or grow them in moist paper towels to start off - it's up to you.
Here's two films to show you how to plant them.
1. Planting in soil:
Don't forget to poke some holes in the bottom of your pot/plastic cup - this will avoid drowning the seeds, but remember to place your pot on a saucer or dish if you do this.
Click here to see where to plant the seeds in soil.
2. Planting in paper towel or cotton wool:
Pack you pot/cup/glass with paper towel or cotton wool to hold the water, and place your seed on the outside. Remember to dampen the papertowel with water.
Click here to see where to plant the seeds in paper.
Task 4:
Put one of your pots in a sunny position, and hide one away in a dark place - maybe a cupboard, or under the stairs.
Don't forget to water them each day - but not too much: aspraying them is a good way to do this without overwatering.
Wednesday 10th June:
Geography:
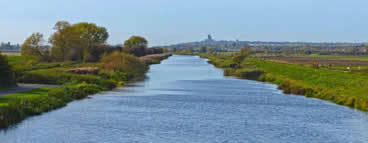
After looking at some major coastal features and how they are created, last week, we are now going to investigate how some river features are created through two river processes : deposition and erosion.
The path of a river changes over time, and it can be surprising to see just how much a river snakes left and right (or meanders) over its floodplain over the years..
I have looked at lots of explanation videos and this one is excellent (and not just because it contains Darth Vader and musk-rats)
Task 1: Watch the video below..
Click here to watch an explanation of why rivers meander and how ox-bow lakes are formed.
Task 2:
Have a look at the diagrams futher down and copy them neatly into your book, along with the labels and explanation.
In case you're wondering the level you can produce, have a look at RD's fantasic , beautiful diagrams below from today.
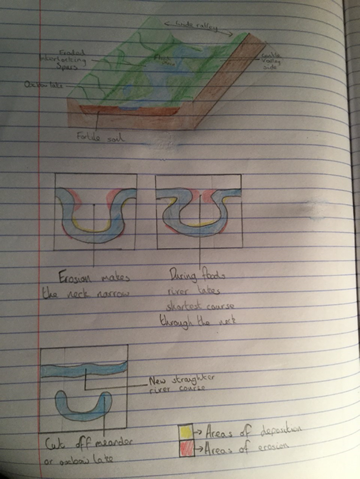
Click here to see the diagrams page
OR copy them from this page (they may be trickier to see here):
Tuesday 9th June:
Art and Design / Music:
If you didn't try the 3D paper/card sculpture Night Ferry artwork last week, we will be trying this in class today.
Video 1:Click here for 1 minute of Night Ferry
Click here for a link to Youtube to hear the whole 20 minutes of Night Ferry. (If you listen from 17 minutes on, you will hear the music change quite dramatically to a calm, quiet seascape)
Task :
Click the link below and watch the second BBC Ten Pieces film, for a great little abstract Night Ferry Sculpture project. It will work best with cardboard or card, but paper will work as well.
(Click the screenshot below)
Don't forget to share your work with us and I'll post up some of the art work we have done in class with year 6.
Monday 8th June:
Design:
After our Pandora task this morning, we need to design a logo for your space holiday travel company. I called mine 'Inta-stella Travel', but you may come up with another name.
Remember, your company is the most modern, future thinking company there is on earth, and you are carrying customers across the universe for an 'eco' based plantetary trip. Can you find a design which with include all those ideas in one: beautifully designed, with simple idea - in much the same way in which lots of you designed your class logo. I've added some examples below:
Tips:
1. You could include images relating to space travel, Pandors, or the creatures that inhabit the planet.
2. You could include your full company name, or additional information - such as a company motto:
Example - Safe in the Stars with Us
3. You might create simple shapes and designs from more complicated pictures - have a look at the creatures of Pandora: can you create a simplified silhouette or design to put on your logo.
Tuesday 9th June:
Have a look at the practise Night Ferry artwork we did in school last week - this week we will be applying our ideas to final pieces on textured watercolour paper, and introducing a paper sculpture activity.

